You
are here
because either you have a webcomic and want to sell print copies to
your
fans, or you are about to set up a webcomic and want to know what to do
to produce a webcomic that is easy to move to printed paper.
If you have a
webcomic, then it is a matter of formatting your comic to fit the
different book-sizes we
print. For the neophyte, it is even simpler: create your comic to fit
one of the book-sizes
we offer and at the final stage save your comic in both the resolution
used for the web
and the hi-res version required for print.
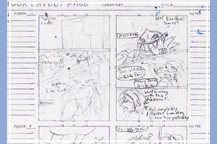
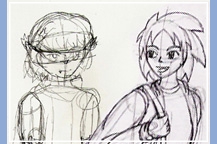
Printed
paper
requires a much higher resolution than a video monitor. Typically, professional and established
artists
such as Phil and Kaja Foglio (Girl
Genius), Tarol Hunt (Goblins
),
and Scott Kurtz
(PvP
) create
their comics using a combination of hand-drawn art and computer
software.
The last steps, after everything is completed, proofed, and finalized,
are to save the
finished artwork in a printer-friendly file format and resolution, a
web-friendly format
and resolution, and then an archive version. For printed comics use one
of these three
formats, TIFF, PNG, or PDF, at a high resolution of at least 300 dpi
(dots-per-inch) for
color art or 600 dpi for gray-scale or line-art. Some artists go even
higher, all the way up
to 2400 dpi, knowing that the extra details this creates are not really
needed but liking
that extra assurance. The artists then save the artwork a second time
in the web-friendly
.JPG format at a resolution of 72 dpi. We suggest that if you work
primarily with line-art
then save your comic as grayscale to make the text in the word ballons
appear smoother,
with less jaggies to distract the reader’s eyes.
The
final step
is to create an archive copy of the artwork, so that if anything is
needed
from the artwork later, all the information and details are intact--and
typically
professional artists save the artwork at a much higher resolution that
also allows them to
create poster-sized versions of their comic at some time in the future,
if they so desire. If
the artwork is in layers, make sure to save the artwork with the layers
preserved. All
professionals highly recommend using layers, that way changes to fonts
and artwork are
simpler--like fixing that typo nobody saw until it was posted to the
website. NEVER save
artwork you intend to revise in .JPG format. Every time you load and
re-save a .JPG
formatted file, the compression for the image is recalculated so
information and detail are
lost and distortions to the artwork are produced. After about the
fourth time you begin to
see “halos” appear around objects and letters begins to blur or look
like they have an
hazy outline.
Archiving
is
important because things can go wrong with your current computer, as
Randall Munroe (xkcd
)
notes in his first book: “... due to a combination of
disorganization in the early days of the strip and a badly-timed laptop
theft, about 30% of
them [the webcomics] were missing. Since I do the
initial art and lettering on paper, I still
had nearly all the originals, but precisely recreating the comics from
disjointed drawings
... was a daunting task.” Plus, CDs and DVDs are much cheaper than your
time. One
artist just stores everything on Hard Disk Drives, buying a new one
when the current one
gets full. She says it’s much faster when she has to go back through
her artwork for a
particular piece.
Many
artists
love the “digital” world for its “limitless” page sizes. For example,
Randall
Munroe regularly produces illustrations that require 36" x 24" posters
to read when
printed, and even has one that is 72" x 48", while Patrick Farley (Electric Sheep Comix
)
has created a Flash comic that is literally 20+ screens wide (at
1400dpi/screen). However,
it does produce problems when the artist’s fans ask for a printed book
of his/her
webcomic. Plus, as Rhea Ewing (Urban
Fey
) has said, for her first book she had to go
back and reformat (redraw, in other words) the first thirty or so
comics to create a unified
format that would easily translate to a printed book.
So,
take a
look at the various print formats available and select the one that
most easily
works with your comic. The established webcomic artist might go back
and work on
some comics to make them fit the desired format, but it will be worth
the effort.
Remember
that
every sheet of paper in a book has two sides, so ALL books have an even
number of pages. Don't confuse “number of pages” with “number of sheets
of paper.” If
you draw 46 pages for your book then you have a 46-page
book (which will use 23 sheets
of paper — one drawing for each side of the sheet of paper, and thus
two pages). If you
intend that the back-side of each drawing should be a blank page, then
you have a 92-page book using 46 sheets of paper.
Hardcover
versions are available for most books over 110 pages, but that adds
about
$6.00 to the cost of the book.
Remember
to
keep all important text (page titles, page
numbers, etc.) and illustrations, at
least 3/8" (we suggest you use 1/2") inside the
trimmed size of the page unless you want
them to bleed to the edge of the page. If your book is going to be more
than 110 pages we
suggest you use an inside margin of about double the outside margins.
We cannot
guaranttee that the bleed will always reach the edge of the page in the
printed book Pages
do shift slightly left-to-right and up-and-down with respect to each
other as they go
through the printers.
Back to Top
We
offer
“small” paperbacks (5"x8", 6"x9", or 7.5"x9.25") and “large” paperbacks
(7"x10" or 8.5"x11").
If
your comic
is the newspaper style (3 or 4 panels horizontally) the best fit is
7.5"x9.25"
(see the College
Catastrophe
example), although you could also use the
8.5"x11" book as Ralph E. Hayes, Junior, did with Under the Lemon Tree
(example page from the book printed by
Lulu.com). Note that the left-edge gap is wider than the right-edge in College
Catastrophe. This is to allow for the binding of the book
and to prevent the comic from
being difficult to read in the gutter between the pages. Also notice
the edge gaps are
equal in Under the Lemon Tree
, which places the comic oddly close to the binding
when you are holding the book -- in this case there is sufficient
distance from the binding
that there isn't a readability issue, although it might be visually
better if the comic were
closer to the outside edge of each page.
If
your book
is less than 48 pages we can do it as a staple-bound book and that
extra
margin in the gutter between pages is unnecessary. For staple-bound
books pages must be
in sets of four;. i.e., 12, 16, 20, ... , 40, 44, or 48, including
the title page,
copyright/disclaimer page, and any introductory text pages.
For
the
“full-page” comic, it depends on the exact proportions of your comic.
One of the
two sizes we offer, 7"x10" or 8.5"x11", should fit your comic
adequately.
Most
traditional comic books that you buy in stores (Archie, Batman, etc.)
are in the
format of 6.625" x 10.25". Unfortunately, we are unable to produce that
size-format as a
Print on Demand book. The closest match we have is the 7"x10" book.
Back to Top
If
your comic
is in color you may choose the “small” paperback at 5.5"x8.5" or a
“large”
paperback at either 7x10" or 8.5x11". Pick the size that best fits your
comic. The cost
difference between the small color paperback and the large color
paperback is almost
double -- a 96-page small color book costs $7.24 while a large is
$12.58. This means you
must sell to your customer at $19.99 for the large versus $14.99 for
the small book to
make the same profit per book -- and the higher the cost the harder it
is to sell a book.
Print your comic on your printer in both sizes and compare them for
legibility and clarity
before you make a final decision on the book size.
Like
the
Black-and-White books, if your book is more than 48 pages you should
leave an
extra-wide margin in the gutter between pages to help make the comic
more readable.
Otherwise leave the inside and outside margins of each page the same
for staple-bound
books. Also, staple-bound books pages must be in sets of four;. i.e.,
12, 16, 20, ... , 40,
44, or 48, including the title page, copyright/disclaimer page,
dedication page, and any
introductory text pages.
Back to Top
Once
you have
your webcomic in a standardized format (every comic is exactly the same
size, except double-page spreads or 3-or-4 panel strip comics that can
be doubled up--see
College
Catastrophe example),
you must save them in a print-friendly format. If your comic is in
color each comic must be saved at a resolution of 300 dpi in TIFF, PNG,
or PDF file
formats. Make sure that the color space of your comic is set correctly!
For color comics
this is CMYK (Cyan-Magenta-Yellow-Black); for Black-and-White comics
with tones,
this is gray-scale.
Grayscale
and
line-art must be scanned at 600 dpi, images converted to grayscale or
bit-mapped. If saved as a PDF file set the output resolution to 600dpi,
embed all fonts used
(subset should be set to 100%), center the image, and do not include
crop, trim, or printer
registration marks. You can also save the art in TIFF or PNG formats.
If saving line-art
as bit-mapped be aware that sometimes this can make the text in comics
look "jagged" so
we suggest you save your comic as a gray-scale--the difference in file
sizes means
nothing in the finished book.
Scan
all color
images at 300 dpi, convert all colors to CMYK, save all color images as
CMYK, and save all PDF files with output resolution set to 300dpi,
embed all fonts used
(subset should be set to 100%), center the image, and do not include
crop, trim, or printer
registration marks. You may also save the images in TIFF or PNG formats.
Then
build
each page exactly as it should appear in the book. For a full-page
comic
create the page in a program like GIMP, Photoshop, Painter, or other
program capable of
saving a PDF file. Place the formatted copy of your comic inside that
page. Keep all
important text, and
illustrations,
at least 3/8" inside the trimmed size of the page;
we
suggest 1/2". If your book is going to be more than 110 pages we
suggest you use an
inside margin of about double the outside margins.
For
a
comic-strip, you build the page as explained, and then place however
many of your
comics will fit on that page (see College
Catastrophe or Under the Lemon Tree examples). Once
the page is complete, with any page numbers or other information you
want included on
the page, save the page in PDF file format.
For
Black-and-White text-blocks, set the color-space to grayscale or
bitmapped. Save all
PDF files with output resolution set to 600dpi, embed all fonts used
(subset should be set
to 100%), center the image, and do not include crop, trim, or printer
registration marks.
You must use the file name convention “book
title_file number” on each file
(MYBOOK_001.PDF, MYBOOK_002.PDF, MYBOOK_003.PDF, etc.). Remember that
the file number will begin with the first page of the book, typically
the title page. Page
numbers generally start with the actual comics and thefore may be
numbered differently
from the file numbers.
For
Color
text-blocks, save all color images as CMYK, save all PDF files with
output
resolution set to 300dpi, embed all fonts used (subset should be set to
100%), center the
image, and do not include crop, trim, or printer registration marks.
You must use the file
name convention “book title_file number” on each file
(MY2NDBOOK_001.PDF,
MY2NDBOOK_002.PDF, MY2NDBOOK_003.PDF, etc.). Remember that the file
number will begin with the first page of the book, typically the title
page. Page numbers
generally start with the actual comics.
If
you have
the expertise, you can send us the completed PDF text-block (that is,
the title
page, the copyright/disclaimer page, dedication, blank pages, and any
introductory pages
you might want, and all the pages with comics in place, properly
paginated with page
numbers and headers/footers) as a file in a ZIP container file
(with both the PDF file and a README.TXT file that has your name,
address, phone number, and email address so we can contact you) over
the Internet, or you
can mail it to us on
a CD/DVD.
You
may also
send us a compressed ZIP container file with the separate page files
inside
named with the convention “book title_file number” on each separate
file
(MY3RDBOOK_001.PDF, MY3RDBOOK_002.PDF, MY3RDBOOK_003.PDF, etc.). If
you do choose to send separate files in a single ZIP container file,
remember that the file
number will begin with the first page of the book, typically the title
page. Page numbers
generally start with the actual comics and thefore may be numbered
differently from the
file numbers. For your covers, use MY3RDBOOK_COVER_FRONT,
MY3RDBOOK_COVER_BACK, and MY3RDBOOK_COVER_SPINE.
Another
method
is to separate the text-block into sections, following the same naming
convention (YOURBOOK_001.PDF, YOURBOOK_002.PDF, YOURBOOK_003.PDF,
etc.), send the title page, copyright/disclaimer page, dedication page,
blank pages,
introductory material (if any), as separate files, and then the rest of
the book as a single
file (or several files) in the ZIP container file. We will assemble the
complete text-black and
email it to you, or
make it otherwise available on our website for you to download. Once it
is approved we
will move to the next step.
You
may also
send us a ZIPped container file with the separate page files inside
named
with the convention “book title_file number” on each separate file
(MYBOOK_001.PDF,
MYDBOOK_002.PDF, MYDBOOK_003.PDF, etc.). If you do choose to send
separate
files in a single ZIP container file, remember that the file number
will begin with the first
page of the book, typically the title page. Page numbers generally
start with the actual
comics and thefore may be numbered differently from the file numbers.
Finally,
if you want us to build the pages for you, you can either
simply
sequentially number the files and let us place them on the pages, or
you can number them sequentially in groups MYBOOK_001A.TIFF,
MYBOOK_001B.PNG, MYBOOK_001C.TIFF, MYBOOK_002A.PNG, MYBOOK_002B.PNG,
and so forth) in the order you want them placed on the pages. Do not
forget to include the text and/or artwork for the title page, copyright
page, introductory pages, etc., so we can build a complete book for
you.
If
you use any
fonts in your comic, you must embed the complete
font in the file. If you
are sending the book as separate files, you must embed
the complete font in each file for
each font used on that page.
All
Flying
Chipmunk Comic Press interior text-blocks are produced on acid-free
archival-quality paper. Non-color books use 55-lb white interior paper,
color books use
slightly heavier 70-lb white interior paper.
Back to Top
The
cover is
the most important part of a book. A good cover will draw readers to
your
book.
Three
things
make a good cover: 1) The upper third must be empty of characters or
anything important to the illustration; 2) the
cover should prominently feature your
characters; 3) there should be action happening--and
headed to the right of the cover (or
your characters should be looking or pointing
to the right).
The
book
title/subtitle/author will take up the top third of the page. Do not
place letters
over a character’s face! An overall darkness or lightness to the top
third is also desirable--making it easier to select a matching color
for the Title so it stands out. There should be
no dark text against a dark background, or vice versa. Outlining the
individual letters
with a contrasting color helps make them stand out against a busy
background, but why
do that when you can avoid it in the first place? When choosing colors
for the lettering,
pick a color from the picture and use it as the main color. Using a
color not present in the
illustration makes the cover look “off.” Browse the books at the
library and see how
professional cover artists manage the artwork.
It
is your characters
the reader wants to see, not some landscape, no matter how
beautifully drawn. Reader’s eyes are drawn to people (or animals), not
so much to
landscapes or things. There is a reason why car magazines have
beautiful models draping
themselves over those cars on the covers--you see the person first, the
car second. And
once you see the car, you might buy the magazine. Covers without people
on them
simply don’t sell as well (notice, also, that the model on those car
magazine covers is
staring directly out at you, to engage you to look at her--we tend to
notice when people
look at us).
People
like
action; having something exciting on the cover conveys the impression
that
something exciting is going to happen inside the book. Most books open
on the right; by
directing the viewer’s eyes to the right you are giving them a subtle
hint to pick up the
book and open it. You make them want the book.
Even
if you
plan on selling the books only on your website, make the cover look
enticing
as a thumbnail. A dark, ugly cover or a static bland cover will
hurt your sales, regardless
of the quality inside.
On
all covers,
provide a bleed outside the trimmed size of the
page of about .25". Keep
all important text, and illustrations, at least 3/8" inside the
trimmed size of the page. The
cover must use the CMYK-color scheme, RGB is not accepted at this time.
For black text
on the cover we suggest Cyan 60%, Magenta 40%, Yellow 40%, and Black
100%. Do
not use Registration Black. As with the text-block, embed all fonts
that are used. We do
not maintain a font library for authors. Scan your color cover image at
300 dpi, convert it
to CMYK, save it as CMYK, save the PDF file with output resolution set
to 300dpi,
embed all fonts used (subset should be set to 100%), center the image,
and do not include
crop, trim, or printer registration marks.
Your
cover
illustration should be made at 1.5-times the actual cover size. Thus a
7"x10"
book should be drawn on a page 10.5"x15". When shrunk down to 7"x10"
the details will
look finer and imperfections will mostly disappear. Some professional
book/magazine
cover artists even make their drawings at double target cover size. Use
your judgement.
If
you are
sending the covers as separate files in a ZIP container file, use
MY3RDBOOK_COVER_FRONT, MY3RDBOOK_COVER_BACK, and
MY3RDBOOK_COVER_SPINE filename conventions.
All
cover
stock at Flying Chipmunk Comic Press is acid-free, archival-quality,
and
laminated.
For
Black-and-White interior books, the color book-covers 7"x10" and below
are printed
on 90-lb white cover stock. The 8.5"x11" color book-covers are printed
on 80-lb white
cover stock.
For
Color
interior books, small color book-covers are printed on 90-lb white
cover stock,
while the large 7"x10" and 8.5"x11" color book-covers are printed on
80-lb white cover
stock.
Back to Top
When
you have
completed the book and saved all the files into a ZIP container either
upload the file on our Book
Submissions
page or send us a CD/DVD with all the
sections included. Don't forget to include a README.TXT file with your
full name (or business
name) and address, as well as the email address you want us to use when
contacting you. Please also send a separate email
to Submissions
(at)
FlyingChipmunkComicsPress (dot) com telling us
your information and
that you have upoaded a file for us to process. We will create a PayPal
Invoice and send it to you. This is the only time we will charge you
for our services other than for Proof copies or ISBNs. On receipt of
your PayPal payment we will review the book
and if we have any suggestions,
questions, or comments we will contact you. Otherwise, we will send you
a
completed PDF of the book for your review and approval.
Black-and-White
books will either be emailed to you as a completed PDF file for
approval or we can send you a CD. You may also request a printed proof
copy of your
Black-and-White book. Color books require a proof
copy be mailed to you. There is a
charge of $40 for proof copies. If you have no corrections to the
books, send us your
approval via email. If there are problems, tell us in detail what the
problems are, and
where they are located. If the problem(s) are our fault, there will be
no charge for the
second proof.
Be
aware that
unless you have a color-synchronized monitor (that is, the color blue
on
your monitor is actually being displayed with an RGB value of R=0, G=0,
B=255) the
colors you see on your screen might not be exactly the same as the
colors in the book.
Similarly, unless your printer has also been synchronized with your
monitor to print that
RGB blue as R=0, G=0, B=255, the colors you print from your printer
might not match
those in the book. (Home printer colors also depend on the paper you
are using -- photo
paper is noticeably brighter than even the best white copy paper for
laser and inkjet
printers. The slight gray of 92% brightness paper will shift lighter
colors, especially the
yellows, making them darker than they will appear in the book.) Even
specifying a
Pantone Color is no guarantee to match exactly with
what you expect--colors drift during
printing and there are color variations even between copies of the same
book printed in
the same print run.
Back to Top
Once
the
finished book is approved, you can order however many copies of your
books
as you want, with a minimum of 20 copies. You will be charged for
shipping, the cost
will depend on where you live in relation to our printing facilties
(Kansas). As a rule,
budget about $1 per book for shipping. It will usually be less than
that. When you place
your order, you will be told the shipping costs for the order. Send
your order to orders (at)
flyingchipmunkcomicspress (dot) com, including the
name of the book, the ISBN, the quantity wanted, and where you want the
copies delivered (if the address is different from your normal address,
we will contact you for verification of the delivery address).
At
this time
we accept only Paypal as the payment method. We will send
you a
PayPal Invoice for your payment. If you decide not to proceed with the
order, simply ignore and delete the Invoice. If we do not receive
payment from you within 30 days we will assume you no longer want that
order implemented and will delete the Invoice from our system. No books
have been printed, thus no money is owed.
When
your
payment is received, your order will be placed in the production cycle.
Most
orders are shipped within a week, and depending on where you live the
shipping could
take a like amount of time to arrive. We ship via UPS, and must deliver
to a street
address, not a P.O. Box..
If
you have
any questions, feel free to contact us at editor (at)
FlyingChipmunkComicsPress (dot) com.
Back to Top